
But the main thing I'm focusing on right now is learning to solder well with my torch, and making rings. I've been majorly inspired by a woman named Clarity who makes the most awesome rings for her Etsy store, and I won't be happy until I can make such beautiful things myself. So I have made a few attempts at ring making, although my ring mandrel hasn't arrived yet (it should be delivered this week).
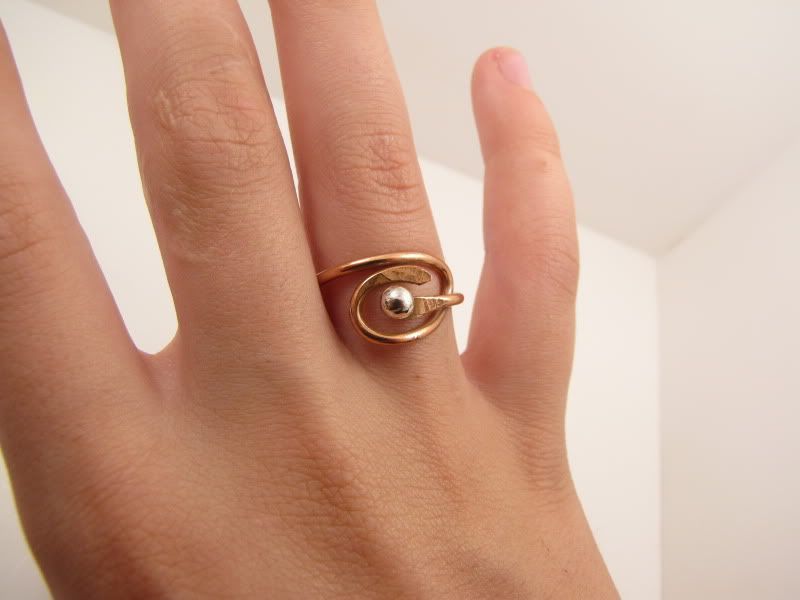
They do have their flaws, but they aren't bad considering they are my first attempts and I'm just learning as I go, with no formal training. I've already learned a lot while making them (mostly from having to go back and fix the mistakes, lol). For example, I made this copper wire ring first (above). I actually used what I think may be a tire iron to help bend it into shape. I hammered the ends of the copper wire, and I like the way they look but I now know that I need to file and sand them smooth before shaping the ring because if I do that part last it is hard to file without the rest of the ring getting in the way. They didn't get completely smooth, so there are shadows in the pictures that look bad even though it is much less noticeable in person. I made the silver ball by melting a scrap piece of silver that I had lying around., and I really like the way it stands out, all shiny and round, so I will probably be making more with this feature. It took a few tries to shape the silver into a perfect ball, so that was a learning experience too.
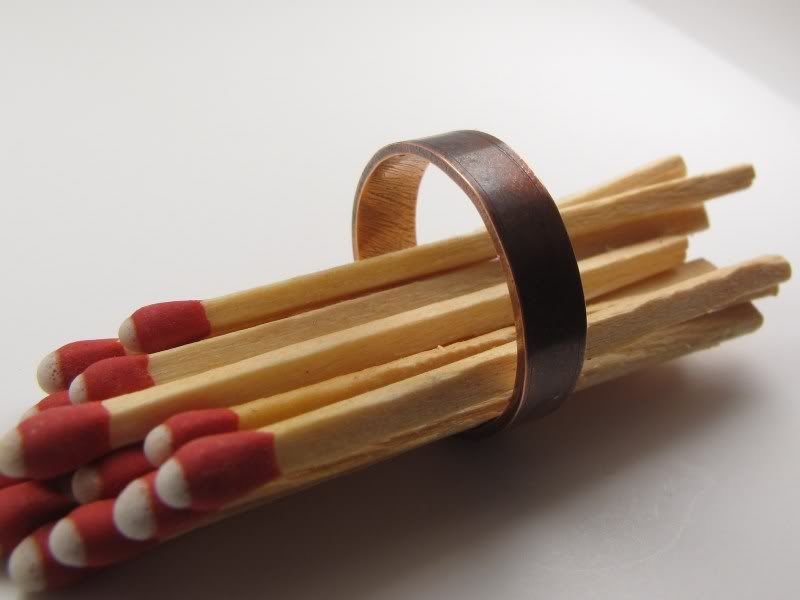
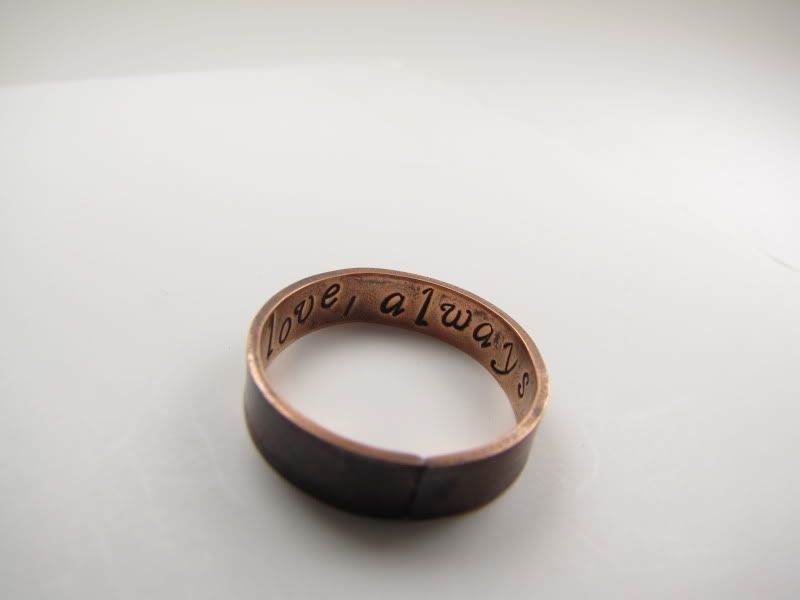
I made this solid copper band for my husband Dale, to fit on his pointer finger and replace an old ring that he wore but didn't much care for. Not having a mandrel to size the ring, I had to use a measuring tape to measure his old ring, then I cut a strip of copper in the same size and filed it down. I found that one of the metal punches in my punch & die set was the same diameter of his ring, so I used it to shape the copper strip. After soldering it together, I realized that I didn't file the ends well enough, although I thought I had done so. I know now that the edges must be very straight and touch together completely before soldering, in order to join them perfectly. I think it still came out pretty well, there is an obvious seam but it is straight and the solder fills it throughout so it doesn't look messy. After the ring was finished, I used a file to lightly etch two rings near the edges of the band for a bit of added interest (you can barely see them in the picture). I think that it would be much easier to do this before soldering, while it is flat. I could probably make the lines a lot deeper that way.
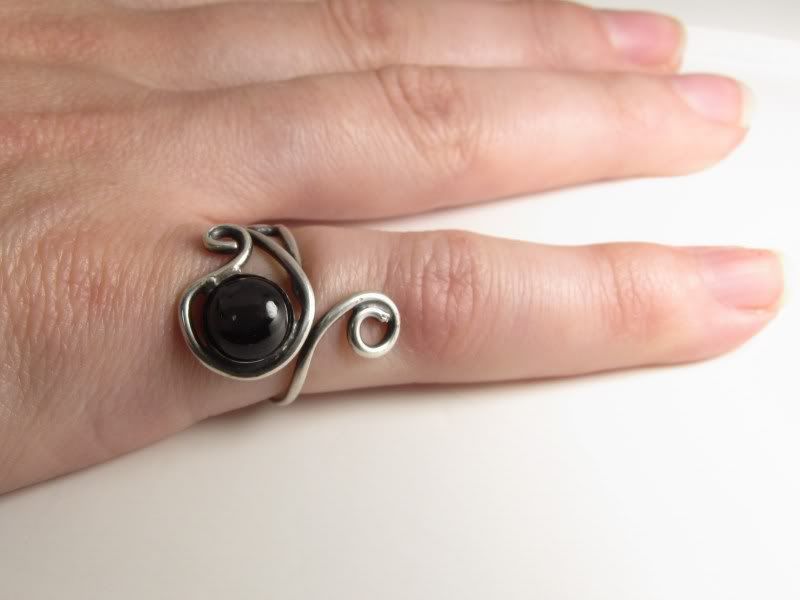
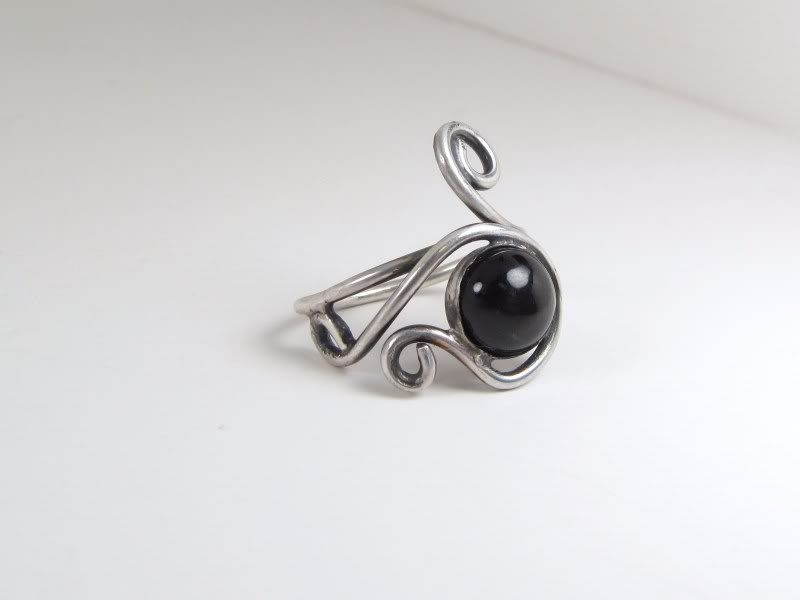
The last ring (pictured below), a sterling silver and black star diopside ring, was the biggest pain EVER. First, I was planning to use a rose quartz on this ring, but I kept dropping and losing the stones on my kitchen floor. Very annoying. I started out with a slightly different design in mind, but it evolved as I was making it. I did end up wasting a bit of silver wire though, bleh. The hardest thing about this ring was trying to solder the pieces together. The wind was blowing my wire and solder around, and blew out my torch on several occasions (I can't wait to get a new torch, mine sucks). Because the ring has an irregular shape, it was hard to get the pieces in the right position to solder them. Dale had the solution though: he brought me some rocks from the driveway, and I used them to prop the metal wire into the positions I needed. So all was good, until I overheated the metal and a previously soldered piece melted. As it did, the wire slipped out of place, then the solder cooled and I now had a hideously disfigured ring. This is where Dale suggested I take a break, because I was getting very frustrated at this point. I had to remelt the solder to free the wires from each other again, and start all over. Ugh. Anyway, I finally got it right, and I think it ended up looking pretty cool. I did a pretty good job of soldering the joints this time around, they looked nice when I was done. I had to file a few places down (mostly where the solder had accidentally melted the first time around) and so I learned about filing away solder, which I had never done before. Once the ring was done, I felt that the black star diopside fit the ring much better than the pink quartz. I used liver of sulfur to antique the silver, which made it look pretty cool in my opinion. You can't tell in the pictures here, but black star diopside gets its name from the way the light reflects off of needle-like inclusions in the stone. It forms a very rare 4-pointed star that shines beautifully off the black surface of the stone.
In all, I am pretty proud of my first set of rings. I won't be selling them, as I see way too many flaws in my technique that I need to correct first. But I am happy enough with them to wear them myself (again, perks of the job! lol), and one day when I am an experienced metalsmith I will look back at them and remember the trials and errors that taught me along the way.
No comments:
Post a Comment